How to Unpublish & Delete a WordPress Website (Step by Step Guide)
So you’ve decided to unpublish your WordPress site to further develop it. Or maybe you want to completely delete an old site to start anew. We’ll help you through the process.
Learning how to delete or unpublish a WordPress site is a basic skill that every WordPress user should have. Because you’ll never know when you’ll need to unpublish your site.
For example, if you discover an issue with your website or theme design, you can unpublish your site until you fix the problem. The same goes for deleting a site, except it’ll permanently wipe out your site from the Internet.
Whichever reason it may be, we’re here to help. In this quick guide, we’ll show you exactly how to unpublish posts, pages, and your website. If you want to delete your site, there’s a quick guide on that process too. Let’s get started.
One Subscription: Everything You Need to Build a Website
Get everything you need to build your next website with one simple subscription. From $16 per month, get unlimited access to nearly 2 million WordPress themes, web templates, fonts, graphics, and photos.


How to Unpublish WordPress Posts & Pages
Accidentally publishing posts or pages is a mistake almost every WordPress user makes every once in a while. But, there’s no reason to delete your entire site for it.
If you only want to unpublish a post or page in WordPress, there’s a very easy way to do it.
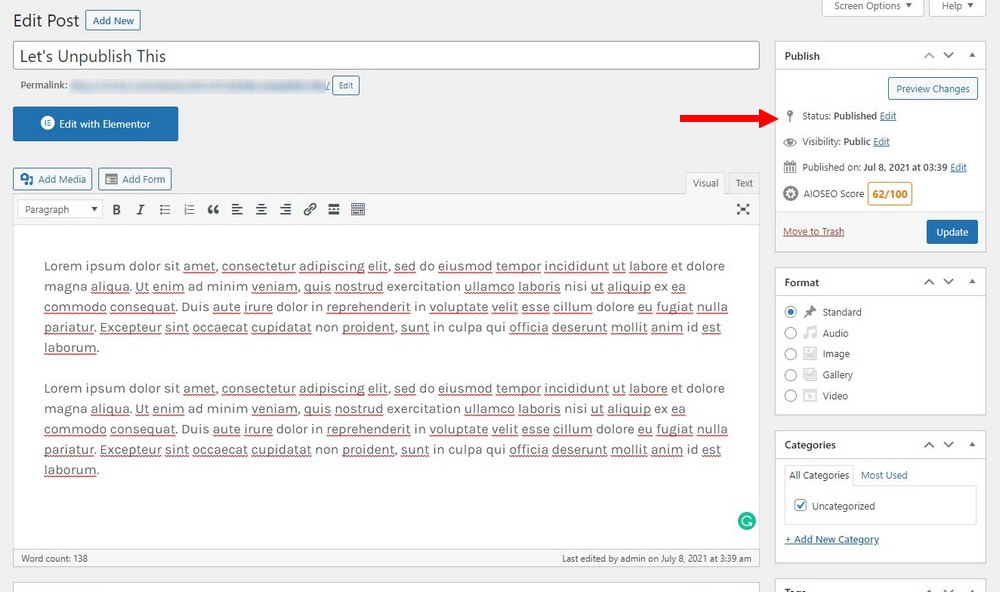
First, open the post or page you want to unpublish. On the Publish module at the top-right corner, you’ll notice that the Status is set to published.
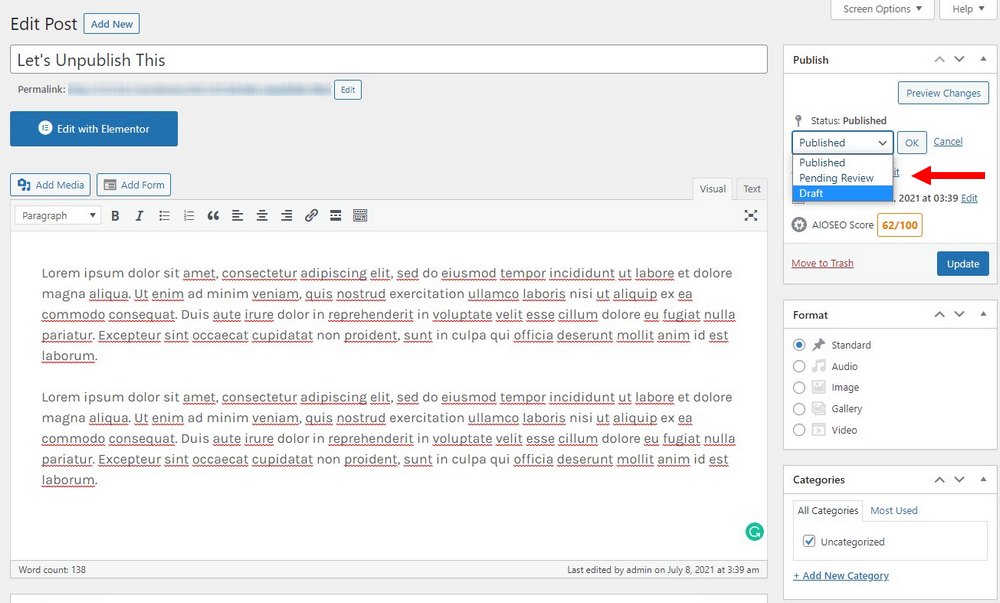
Click on the Edit button next to the Status option. Now select Draft from the drop-down menu and click OK. Then click the Update button to save the changes.
This will revert your published post back to draft status. It will remove the post from the live website. And you can republish it whenever you want.
How to Unpublish a WordPress Site
You can also unpublish an entire WordPress site as well. Similar to unpublishing posts, your website won’t be visible to anyone except for logged-in users of your website. Here’s how it works.
Step 1: Install a Coming Soon Plugin
The easiest way to unpublish a website is to use a Coming Soon plugin. When installed, the plugin replaces your website with a static landing page that says your website is offline. Whenever someone visits your site, they will only see this page.
For the demonstration, we’re using the Minimal Coming Soon plugin. You can use any coming soon page plugin you like.
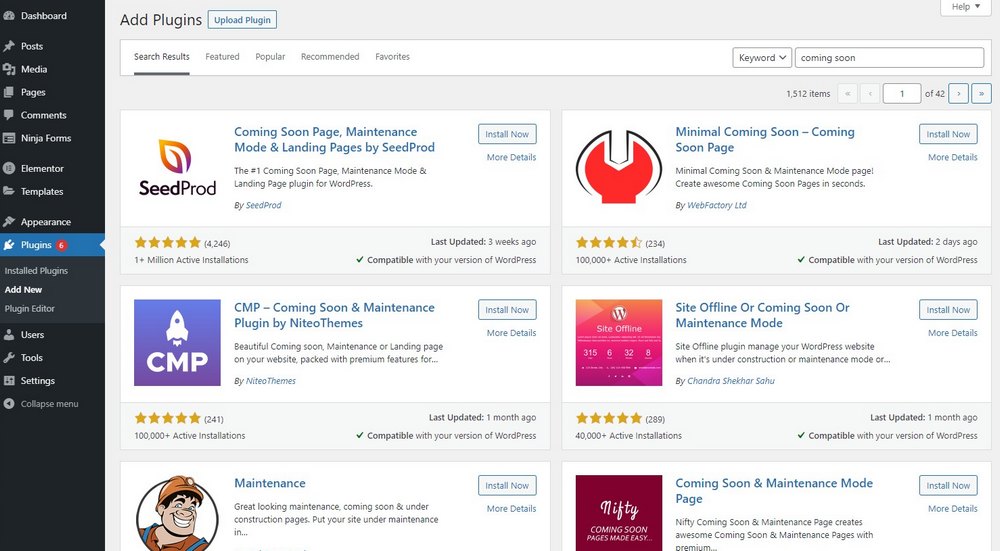
Go to Plugins >> Add New page and search for the coming soon plugin. Then Install and Activate the plugin.
Step 2: Activate the Coming Soon Page
Installing the plugin does not unpublish your site. You need to enable it from the plugin page.
After the installation, find the page for the coming soon plugin. Usually, it can be found in the Settings menu.
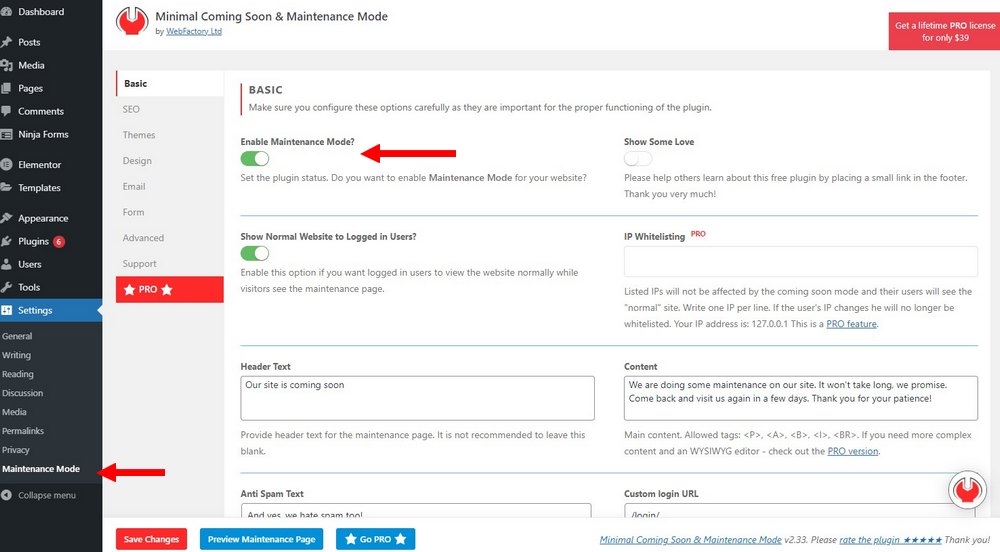
Simply toggle the Enable Maintenence Mode button and click on the Save button to unpublish your site.
From here, you can also customize the design and message shown on the coming soon page.
If you decided to bring your site back online, you can come to this page and disable the Maintenence Mode.
Step 3: Remove Site from Search Engines
If your website has pages indexed on search engines like Google, then people will still visit your site even when it’s unpublished. If you want to prevent that from happening, you can remove your site from search engines.

First, go to Settings >> Reading and tick the box next to the Search Engine Visibility option. This will prevent search engines from indexing your site.
If you’ve had already indexed your site on Google, you can use the Removals Tool to temporarily block links from showing up on search results pages. Follow this guide to learn how it works.
How to Delete a WordPress Site
Completely deleting a WordPress site involves a few extra steps. This will remove your site completely and there’s no coming back. So make sure you’re ready to make this decision before going any further.
Note: By following the steps below, you will completely delete your website from the server it’s hosted on. If you’re new to WordPress, we recommend that you seek expert advice. And backup your site just in case.
Step 1: Login to CPanel
First, login to your web hosting account. From there, you’ll be able to access the CPanel. You can also access CPanel by typing the word “cpanel” at the end of your domain name (eg: yourname.com/cpanel).
If you don’t know how to access CPanel, contact the technical support team for your web hosting provider.
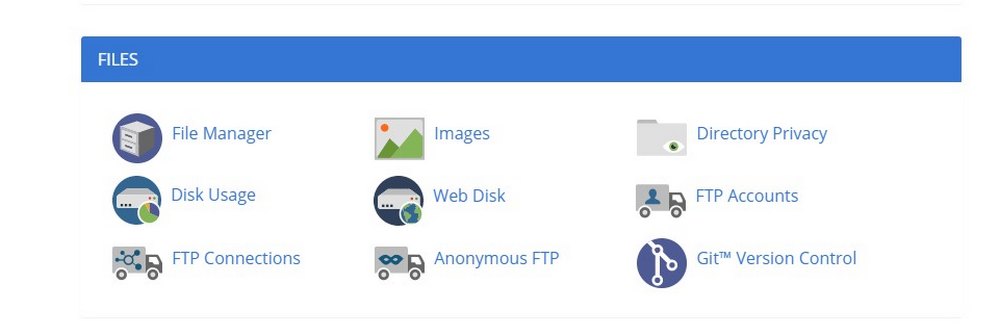
Step 1: Access File manager
After logging into the CPanel, find the File Manager tool. This tool lets you access all the files related to your website and WordPress.
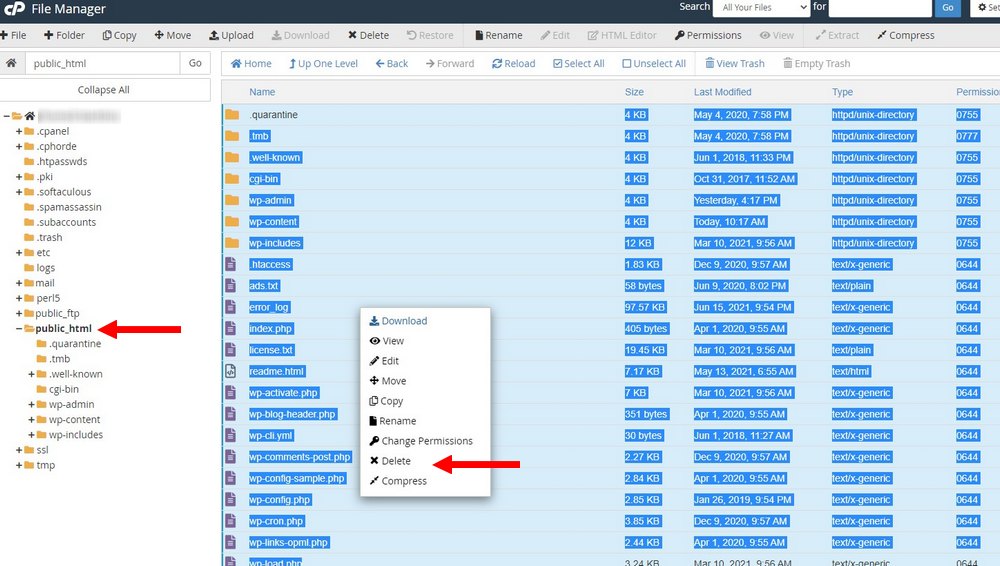
Navigate to the Public_HTML folder. If you only have one website hosted on this account, you can simply select all of the files in the Public_HTML folder, then Right Click and select Delete. It will remove all the files related to your website.
If you have multiple websites hosted on the server, find the folder related to the website inside the Public_HTML folder. And then only delete that folder.
Step 3: Delete Databases
Go back to the CPanel and find the MySQL Databases tool.
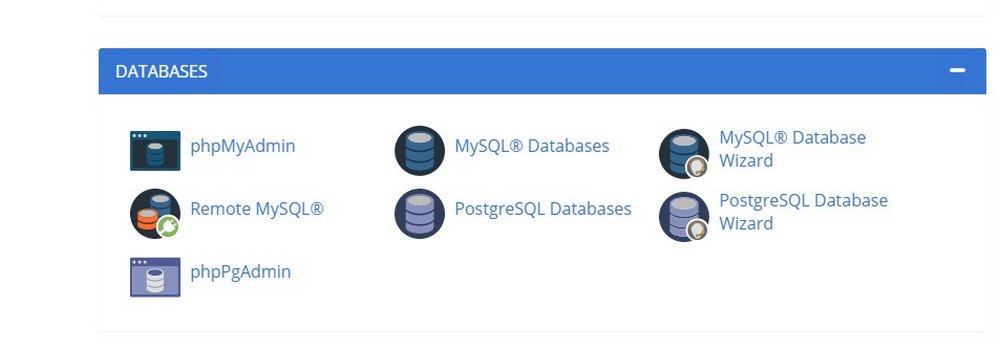
Inside this tool, you’ll find the databases related to your deleted website. You can delete the databases from here to wipe the site clean from the server.
Conclusion
We recommend that you seek advice from an experienced professional before deleting a site. You can also contact the web hosting provider technical support to ask for help.
Some web hosting providers regularly back up your website. So even if you delete your site, you’ll be able to recover it within a period of time.
Looking for WordPress hosting? We use Kinsta. They offer world-class WordPress hosting, built to keep your website fast, secure, and always online.