How To Add Push Notifications In WordPress For Free
Google keeps changing its search algorithm and it often affects most website rankings to drop. Email open rates and deliverability rates are also dropping each month. As a result, many bloggers are now looking for new ways to grow a more stable audience for their websites.
This made the push notification systems a viable source of traffic and lead generation for different types of websites and blogs.
In fact, entrepreneur Neil Patel reports that he drove over 231K visitors to his website using push notifications. He’s only one of the many bloggers who’ve found success with push notification systems.
If you’re interested in learning more about push notifications and how to implement this system in your own WordPress website, then this guide is for you. We’ll walk you through the process step by step on how to set it up. Keep reading.
What Is a Push Notification?
Push notifications are a type of notification that you get from different apps and services even when you’re not using the app. For example, when someone comments on your Facebook post, you’ll get a notification on your phone even when you don’t have the app opened. This is what a push notification does.
Recently, YouTube started allowing its content creators to send push notifications to their subscribers. When opted-in, subscribers now get a notification every time a new video gets uploaded.
The concept of integrating push notifications in WordPress is exactly the same. The main purpose is to notify your audience when you publish a new blog post or when you discount a product, either on their smartphone or on the desktop computer.
Why Use Them in WordPress?
There are many reasons to use push notifications in WordPress.
- More Traffic: You’ll be able to build a new source of traffic for your website with push notifications. And get more valuable clicks and shares.
- Build an Audience: Much like building an email list or social media channel, push notification systems also allows you to build a dedicated audience around your website.
- Better Conversions: The visitors that come from push notifications are people who’ve already visited your website. You’ll have a better chance of converting them into leads and customers.
- Affordable & Less Time Consuming: Since push notifications are sent out automatically, there’s no need to spend time creating the messages. Plus, push notification systems are more affordable than email marketing.
- Sell More Products: If you have a WooCommerce store, you can use push notifications to inform your customers of sales and discounts to drive more visitors to your store.
- Better Delivery Rate: Unlike emails, push notifications don’t get hold up by spam filters or get lost among hundreds of other emails. Users will likely click on your notifications to read your latest posts. Given that you don’t spam them with notifications every 10 minutes.
Best WordPress Push Notification Plugins
Setting up push notifications in WordPress is as easy as installing a plugin. Anyone can set it up without expert technical knowledge. These are some of the top push notification plugins you can use to get the job done.
OneSignal
- Price: Free
OneSignal is one of the best plugins you can use to setup a push notifications system in WordPress. Mainly because it supports both mobile and web push notification. And it comes with a generous free plan that lets you grow an audience of up to 30,000 subscribers.
PushEngage
- Price: Free
PushEngage is another great free plugin you can use to send push notifications. It supports all popular browsers. And even lets you send targeted push notification campaigns. The plugin includes a free plan that limits you to 2500 subscribers. Premium plans start at $29 per month for up to 5000 subscribers.
WonderPush
- Price: €1 per month
WonderPush is a premium WordPress plugin that comes with a very affordable pricing plan. It only costs €1 per month (around $1.19 USD) for an audience of up to 1000 subscribers. And extra €1 for every additional 1000 subscribers. For this price, it gives you unlimited campaigns and notifications.
Fire Push
- Price: $24
Fire Push is another premium plugin for sending push notifications. However, it only costs a one-time price and you get forever free updates. This plugin is quite special as it allows you to send both SMS and web push notifications. It’s most suitable for online stores as it lets you setup notifications for orders placed, restocks, price drops, and more.
Subscribers
- Price: Free / $29 per month
Subscribers is another plugin you can use to setup push notifications, especially for eCommerce websites. This plugin also has a free plan that’s limited to only 200 subscribers. Premium plans start at $29 per month for up to 10,000 subscribers. The specialty of this plugin is the ease of use. Setting it up is quite easy.
How to Setup Push Notifications in WordPress
You can setup any push notification plugin in WordPress with just a few clicks. For the purposes of the demonstration, we’re going to use the OneSignal plugin. But, the process for installing other plugins is usually the same.
Step 1: Install Your Push Notification Plugin
Let’s get started by first installing the OneSignal plugin on your WordPress website.

Go to Plugins >> Add New and search for OneSignal. Then click Install and Activate.
Step 2: Complete the Setup Process
After activating the plugin, go to the plugin’s Settings page. From here, you can complete the setup process.
First, you’ll need an OneSignal account. You can create one for free. After creating the account, you can add your website to OneSignal.
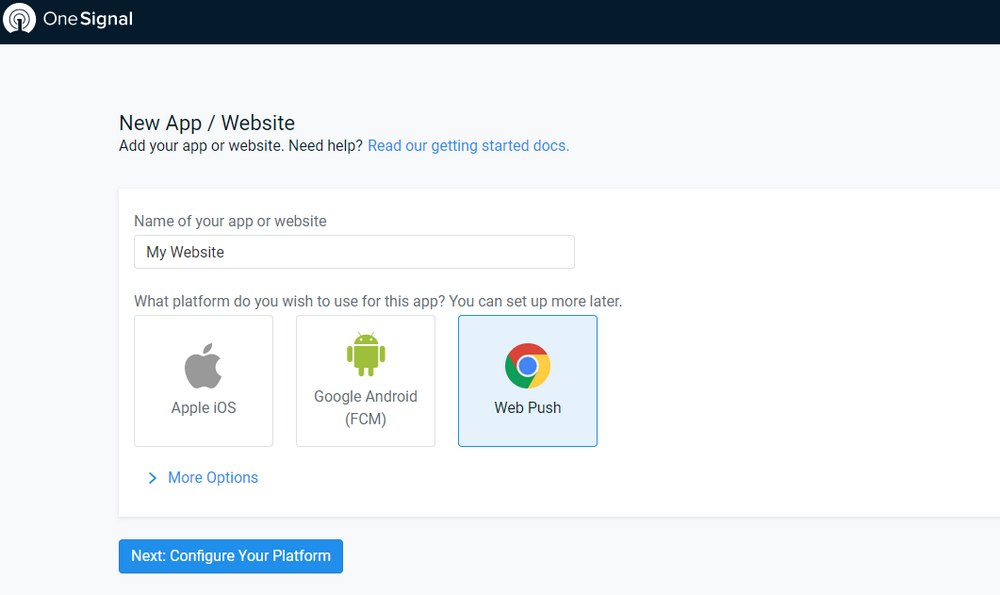
Enter a name for your website. And select which platform you want to send notifications to. For now, select Web Push. You can setup the other platforms later.
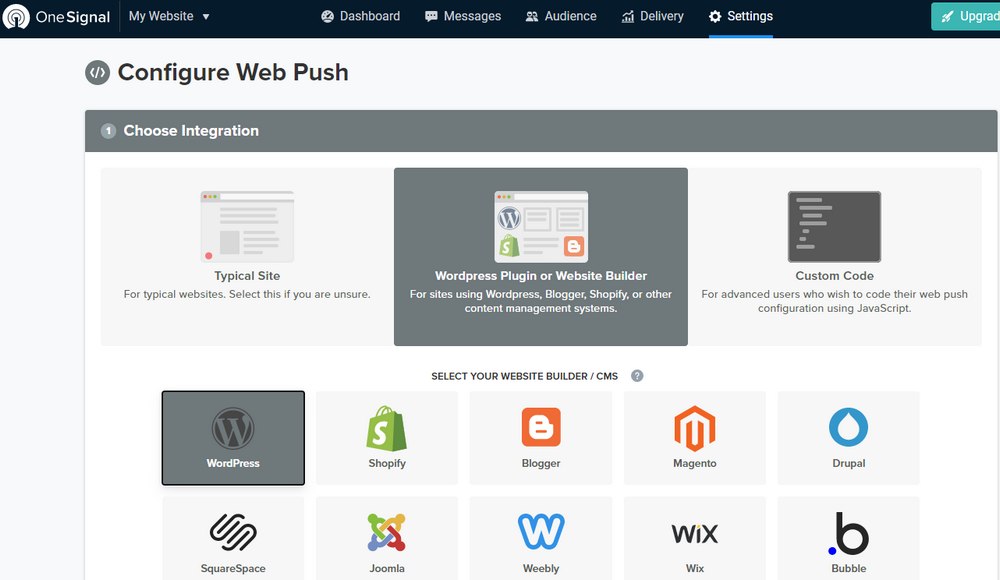
In the next step, select WordPress as your integration method.
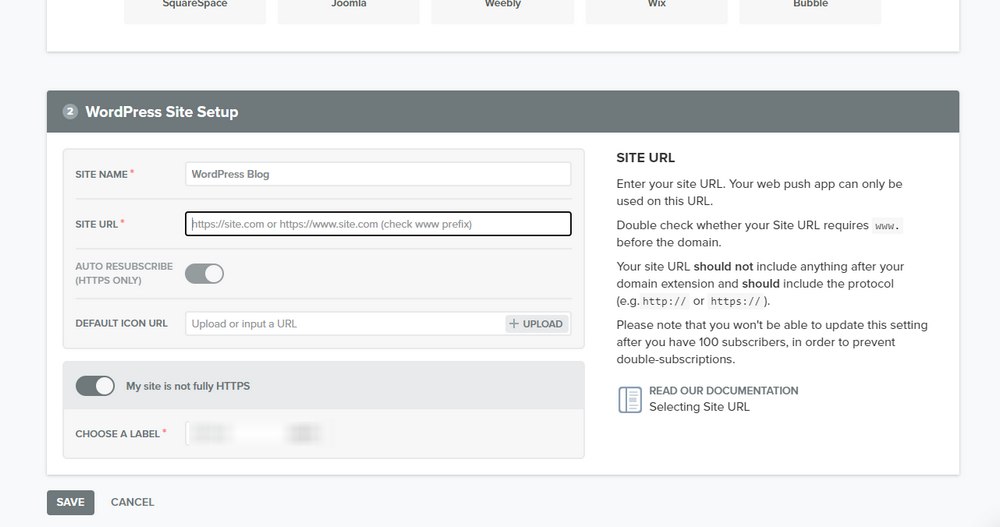
And your website link and details.
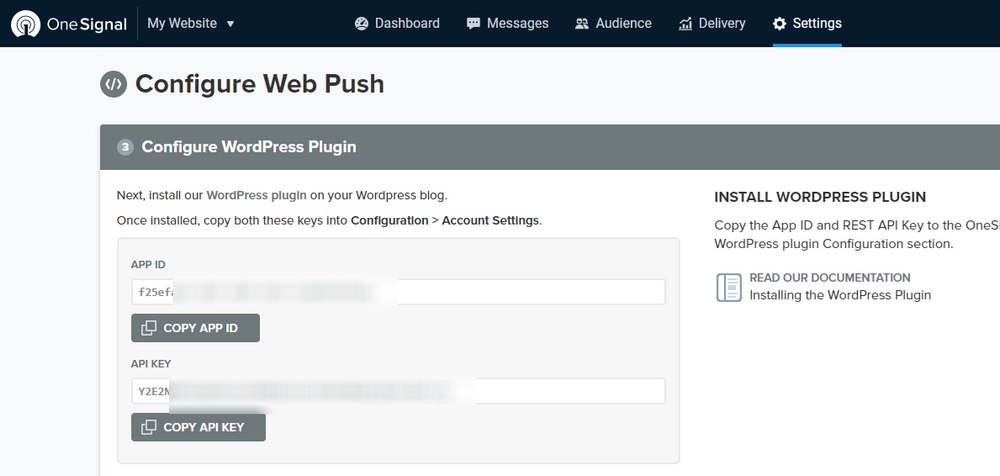
Copy the App ID and API key from the next screen.
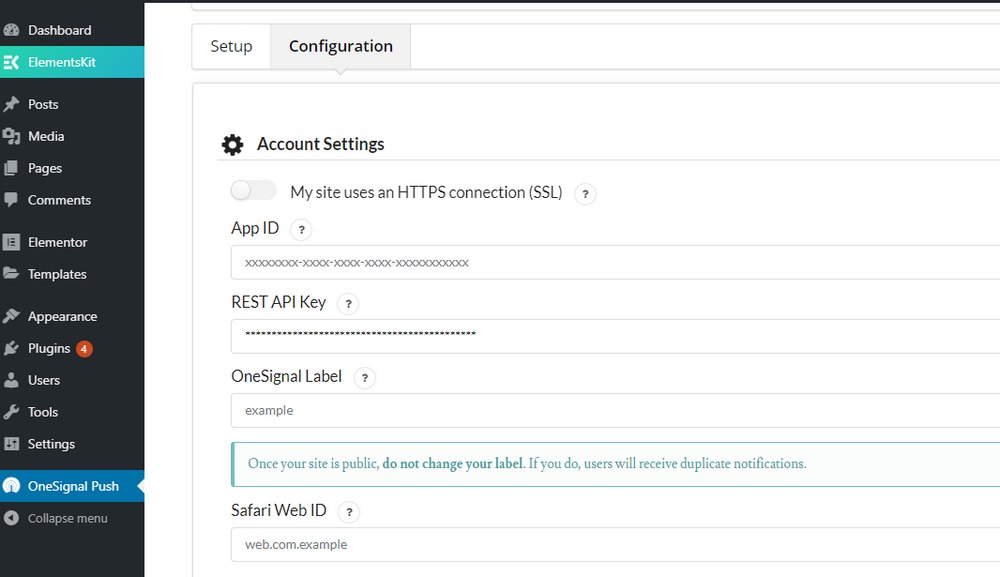
Go back to your WordPress admin dashboard and over to the OneSignal settings page. Copy the API key and App ID codes and paste them in the Configuration tab.
Click Save to connect your website with OneSignal.
Step 3: Customize the Settings
Once the integration is complete, you can customize the settings for OneSignal to change how notifications are sent to your subscribers.

You can change the design of the notifications. Edit the messages. And much more from the WordPress settings page for OneSignal.
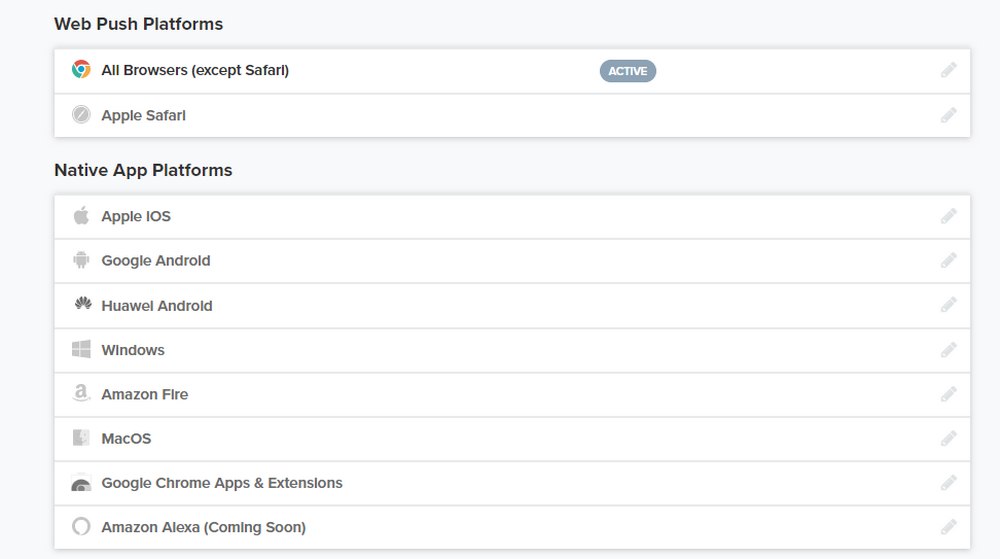
And you can setup more platforms to send notifications to via the OneSignal account page.
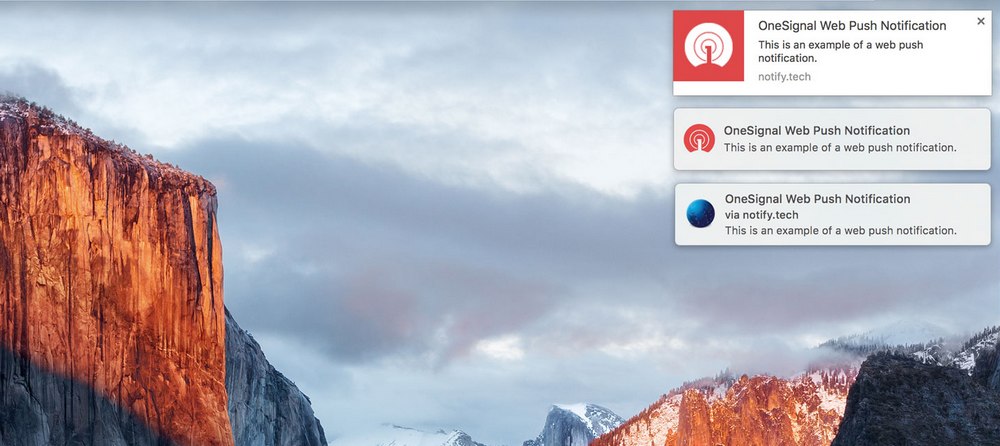
When the system is up and running, your subscribers will start receiving notifications whenever you publish a new blog post.
In Conclusion
It goes without saying that you should always be more mindful when using systems like push notifications. Excessive use of such features will not only interfere with your website visitor’s experience but could also lead to Google penalties.
If you have a website that publishes multiple posts per day or several posts at once, it’s best to either schedule the notifications to be sent gradually or avoid using the system altogether.
For the majority, this is actually a solid way to build an audience and traffic to your website. And it’s definitely worth giving it a try.
Be sure to check out our exclusive themes bundle to get 60+ premium themes for the price of one.
Looking for WordPress hosting? We use Kinsta. They offer world-class WordPress hosting, built to keep your website fast, secure, and always online.